
动作识别基于飞桨复现MVF
《MVFNet: Multi-View Fusion Network for Efficient Video Recognition》论文复现。复现精度:96.6%
基于Paddle复现《MVFNet: Multi-View Fusion Network for Efficient Video Recognition》
1.简介
在这篇论文中,作者提出了从多视点对HxWxT的视频信号进行建模,引入了一个高效的时空模块,称为多视点融合模块MVF。MVF是一个即插即用的模块,可以将现有的
2D CNN模型转换为一个功能强大的时空特征提取器,并且开销很小。

在上图中,在一个标准的ResNet的block中集成了MVF模块。在MVF模块中,输入的特征图被分为两个部分,一部分用于用于原始的激活函数计算。另一部分,用于多视图时空建模
,在MVF模块中,多视图建模分别通过时间、水平和垂直维度的卷积来执行。然后将这个三个卷积的输出的特征图按元素相加,最后两部分的特征图连接在一起来融合原始的激活函数输出和
多视图模块的激活函数输出。
2.复现精度
在UCF-101数据的测试效果如下表。
| Network | opt | image_size | batch_size | dataset | split | top-1 | mean class accuracy |
|---|---|---|---|---|---|---|---|
| MVF | SGD | 224x224 | 16 | UCF-101 | 1 | 96.83% | 96.75% |
| MVF | SGD | 224x224 | 16 | UCF-101 | 2 | 96.65% | 96.68% |
| MVF | SGD | 224x224 | 16 | UCF-101 | 3 | 96.48% | 96.49% |
| Network | top-1(over 3 splits) | mean class accuracy(over 3 splits) |
|---|---|---|
| MVF | 96.65% | 96.64% |
最终在UCF101三种标注的数据集上的mean class_accuracy为96.64%, top-1为96.65%,与论文中的指标96.6%持平。
同时本次还对复现模型进行了对齐验证,对齐说明在精度对齐说明文档,验证结果证明模型复现正确。
MVF模块代码解析
网络选择ResNet50作为Backbone,使用TSNHead作为网络的Head,这看起来与普通的TSN网络并无区别,但上面提到MVF是一个即插即用的模块,可以将现有的2D CNN进行改造。下面就主要看一下MVF相关的代码。
使用以下代码创建一个网络,指定backbone、class head以及module config。其中module config里面指定了类型为MVF,同时指定了必要的参数。
 model = Recognizer2D(backbone=backbone, cls_head=head,
                         module_cfg=dict(type='MVF', n_segment=16, alpha=0.125, mvf_freq=(0, 0, 1, 1), mode='THW'))
在Recognizer2D中,使用_prepare_base_model方法来对Resnet网络实现改造。以下代码片段显示了,使用make_nulti_view_fusion方法,对backbone进行改造。
if backbone_name == 'ResNet':
    # Add module for 2D backbone
    if module_name == 'MVF':
        print('Adding MVF module...')
        from models.recognizers.MVF import make_multi_view_fusion
        make_multi_view_fusion(self.backbone, **module_cfg)
以下是make_multi_view_fusion的完整代码,代码解析见注释。
def make_multi_view_fusion(
        net, n_segment, alpha, mvf_freq=(1, 1, 1, 1),
        use_hs=True, share=False, mode='THW'):
    """Insert MVF module to ResNet"""
    # 本例中,n_segment_list为[16, 16, 16, 16]
    n_segment_list = [n_segment] * 4
    assert n_segment_list[-1] > 0
    print('=> n_segment per stage: {}'.format(n_segment_list))

    n_round = 1

    # 构造MVF block的函数
    def make_block_MVF(stage, this_segment):
        """build MVF Block"""
        blocks = list(stage.children())
        print('=> Processing stage with {} {} blocks residual'.format(len(blocks), mode))
        # 遍历当前stage的每一个层,
        for i, b in enumerate(blocks):
            if i % n_round == 0:
                # 以下操作为在b.conv1前插入一个MVF模块,如简介中的图所示。
                blocks[i].conv1 = MVF(
                    b.conv1, this_segment, blocks[i].conv1._in_channels, alpha, use_hs, share, mode)
        # 最后重新组成一个网络层队列。
        return nn.Sequential(*blocks)

    # 分别对4个层进行MVF模块插入改造。
    net.layer1 = make_block_MVF(
        net.layer1, n_segment_list[0]) if mvf_freq[0] else net.layer1
    net.layer2 = make_block_MVF(
        net.layer2, n_segment_list[1]) if mvf_freq[1] else net.layer2
    net.layer3 = make_block_MVF(
        net.layer3, n_segment_list[2]) if mvf_freq[2] else net.layer3
    net.layer4 = make_block_MVF(
        net.layer4, n_segment_list[3]) if mvf_freq[3] else net.layer4
下面看一下MVF模块的相关代码。
class MVF(nn.Layer):
    """MVF Module"""
    def __init__(self, net, n_segment, in_channels, alpha=0.5, use_hs=True, share=False, mode='THW'):
        super(MVF, self).__init__()
        self.net = net
        self.n_segment = n_segment
        num_shift_channel = int(in_channels * alpha)
        self.num_shift_channel = num_shift_channel
        self.share = share
        if self.num_shift_channel != 0:
            self.split_sizes = [num_shift_channel, in_channels - num_shift_channel]
            # 定义Channel-wise Conv 卷积层,对应图中卷积
            self.shift_conv = nn.Conv3D(
                num_shift_channel, num_shift_channel, [3, 1, 1], stride=1,
                padding=[1, 0, 0], groups=num_shift_channel, bias_attr=False)

            self.bn = nn.BatchNorm3D(num_shift_channel)
            self.use_hs = use_hs
            self.activation = HardSwish() if use_hs else nn.ReLU()
            self.mode = mode

            if not self.share:
                if self.mode == 'THW':
                   # 定义Channel-wise Conv 卷积层,对应图中卷积
                    self.h_conv = nn.Conv3D(
                        num_shift_channel, num_shift_channel, [1, 3, 1], stride=1,
                        padding=[0, 1, 0], groups=num_shift_channel, bias_attr=False)
                    self.w_conv = nn.Conv3D(
                        num_shift_channel, num_shift_channel, [1, 1, 3], stride=1,
                        padding=[0, 0, 1], groups=num_shift_channel, bias_attr=False)
                elif self.mode == 'T':
                    pass
                elif self.mode == 'TH':
                    self.h_conv = nn.Conv3D(
                        num_shift_channel, num_shift_channel, [1, 3, 1], stride=1,
                        padding=[0, 1, 0], groups=num_shift_channel, bias_attr=False)
            self._initialize_weights()
        print('=> Using Multi-view Fusion...')

    def _initialize_weights(self):
        pass

    def forward(self, x):
        """forward"""
        nt, c, h, w = x.shape
        n_batch = nt // self.n_segment
        if self.num_shift_channel != 0:
            # x = x.view(n_batch, self.n_segment, c, h, w).transpose(1, 2)  # n, c, t, h, w
            x = x.reshape([n_batch, self.n_segment, c, h, w])
            x = x.transpose([0, 2, 1, 3, 4])
            # 对输出参数x在通道维度上进行分割。
            x = list(x.split(self.split_sizes, axis=1))

            if self.mode == 'THW':
                # 对分割出来的新的x做三种不同的卷积,如图中所示。
                # get H & W
                if self.share:
                    tmp_h = self.shift_conv(x[0].transpose(2, 3)).transpose(2, 3)
                    tmp_w = self.shift_conv(x[0].permute(0, 1, 4, 2, 3)).permute(0, 1, 3, 4, 2)
                else:
                    tmp_h = self.h_conv(x[0])
                    tmp_w = self.w_conv(x[0])
                # 最后将卷积后的特征图相加
                x[0] = self.shift_conv(x[0]) + tmp_h + tmp_w
            elif self.mode == 'T':
                x[0] = self.shift_conv(x[0])
            elif self.mode == 'TH':
                # get H & W
                if self.share:
                    tmp_h = self.shift_conv(x[0].transpose(2, 3)).transpose(2, 3)
                else:
                    tmp_h = self.h_conv(x[0])
                x[0] = self.shift_conv(x[0]) + tmp_h

            if self.use_hs:
                # add bn and activation
                x[0] = self.bn(x[0])
                x[0] = self.activation(x[0])
            # 与剩余的x拼接。
            x = paddle.concat(x, axis=1)  # n, c, t, h, w

            # x = x.transpose(1, 2).contiguous().view(nt, c, h, w)
            x = x.transpose([0, 2, 1, 3, 4])
            x = x.reshape([nt, c, h, w])
        # MVF模块的计算完成,输入原有的卷积层进行后面的计算。
        return self.net(x)
3.数据集
UCF-101:
第一部分:https://aistudio.baidu.com/aistudio/datasetdetail/118203
第二部分:https://aistudio.baidu.com/aistudio/datasetdetail/118316
预训练模型:
链接: https://pan.baidu.com/s/10dZTZwKEJ83smSJZ7mtp-w
提取码: rjc8
数据集以挂载到项目中,首先先解压数据集,由于AIStudio空间有限,解压数据集之后,删除数据集压缩包。
%cd /home/aistudio/data
# 数据太多显示解压过程会导致页面卡顿,所以去掉tar的f参数。
!cat data118203/ucf101.tar.bz2.* data118316/ucf101.tar.bz2.* | tar zx
!rm -rf data118*
/home/aistudio/data
4.环境依赖
PaddlePaddle == 2.2.0
5.快速开始
模型训练
分别使用三种不同的训练集标注进行训练:
%cd /home/aistudio/PaddleMVF/
!python -u train.py --dataset_root /home/aistudio/data/ucf101/ --pretrained /home/aistudio/paddle_mvf.pdparams  --batch_size 16 --max_epochs 50 --split 1
!python -u train.py --dataset_root /home/aistudio/data/ucf101/ --pretrained /home/aistudio/paddle_mvf.pdparams --batch_size 16 --max_epochs 50 --split 2
!python -u train.py --dataset_root /home/aistudio/data/ucf101/ --pretrained /home/aistudio/paddle_mvf.pdparams --batch_size 16 --max_epochs 50 --split 3
dataset_root: 训练集路径
pretrained: 预训练模型路径
batch_size: 训练数据的批次容量
split: 指定的训练集标注文件,共有3个,可取值1,2,3.
模型评估
使用最优模型进行评估.
最优模型下载地址:
链接: https://pan.baidu.com/s/1pPXwdtdnbwm2orZ5YhaXCQ
提取码: sp4j
!python test.py --dataset_root /home/aistudio/data/ucf101/ --pretrained ../best_model_e50_s1.pdparams --split 1
!python test.py --dataset_root /home/aistudio/data/ucf101/ --pretrained ../best_model_e50_s2.pdparams --split 2
!python test.py --dataset_root /home/aistudio/data/ucf101/ --pretrained ../best_model_e50_s3.pdparams --split 3
dataset_root: 训练集路径
pretrained: 预训练模型路径
split: 指定的训练集标注文件,共有3个,可取值1,2,3.
模型推理
使用predict.py 脚本可进行单个视频文件的推理预测,可直接使用rawframes格式的数据做测试。
输入视频如下:

执行以下脚本.
!python predict.py --video ../data/ucf101/rawframes/BaseballPitch/v_BaseballPitch_g07_c01 --pretrained ../best_model_e50_s1.pdparams
/home/aistudio/PaddleMVF/datasets/pipelines/transforms.py:477: DeprecationWarning: `np.int` is a deprecated alias for the builtin `int`. To silence this warning, use `int` by itself. Doing this will not modify any behavior and is safe. When replacing `np.int`, you may wish to use e.g. `np.int64` or `np.int32` to specify the precision. If you wish to review your current use, check the release note link for additional information.
Deprecated in NumPy 1.20; for more details and guidance: https://numpy.org/devdocs/release/1.20.0-notes.html#deprecations
  clip_offsets = (base_offsets + avg_interval / 2.0).astype(np.int)
/home/aistudio/PaddleMVF/datasets/pipelines/transforms.py:533: DeprecationWarning: `np.int` is a deprecated alias for the builtin `int`. To silence this warning, use `int` by itself. Doing this will not modify any behavior and is safe. When replacing `np.int`, you may wish to use e.g. `np.int64` or `np.int32` to specify the precision. If you wish to review your current use, check the release note link for additional information.
Deprecated in NumPy 1.20; for more details and guidance: https://numpy.org/devdocs/release/1.20.0-notes.html#deprecations
  results['frame_inds'] = frame_inds.astype(np.int)
W0104 23:03:08.078281  5679 device_context.cc:447] Please NOTE: device: 0, GPU Compute Capability: 7.0, Driver API Version: 10.1, Runtime API Version: 10.1
W0104 23:03:08.083210  5679 device_context.cc:465] device: 0, cuDNN Version: 7.6.
Adding MVF module...
=> n_segment per stage: [16, 16, 16, 16]
=> Processing stage with 6 THW blocks residual
=> Using Multi-view Fusion...
=> Using Multi-view Fusion...
=> Using Multi-view Fusion...
=> Using Multi-view Fusion...
=> Using Multi-view Fusion...
=> Using Multi-view Fusion...
=> Processing stage with 3 THW blocks residual
=> Using Multi-view Fusion...
=> Using Multi-view Fusion...
=> Using Multi-view Fusion...
Loading pretrained model from ../best_model_e50_s1.pdparams
There are 330/330 variables loaded into Recognizer2D.
Top1 class:BaseballPitch prob:0.973984
TIPC基础链条测试
该部分依赖auto_log,需要进行安装,安装方式如下:
auto_log的详细介绍参考https://github.com/LDOUBLEV/AutoLog。
!git clone https://github.com/LDOUBLEV/AutoLog
%cd /home/aistudio/AutoLog/
!pip install -r requirements.txt
!python setup.py bdist_wheel
!pip install ./dist/auto_log-1.0.0-py3-none-any.whl
%cd /home/aistudio/PaddleMVF/
!bash test_tipc/prepare.sh test_tipc/configs/mvf/train_infer_python.txt 'lite_train_lite_infer'
!bash test_tipc/test_train_inference_python.sh test_tipc/configs/mvf/train_infer_python.txt 'lite_train_lite_infer'
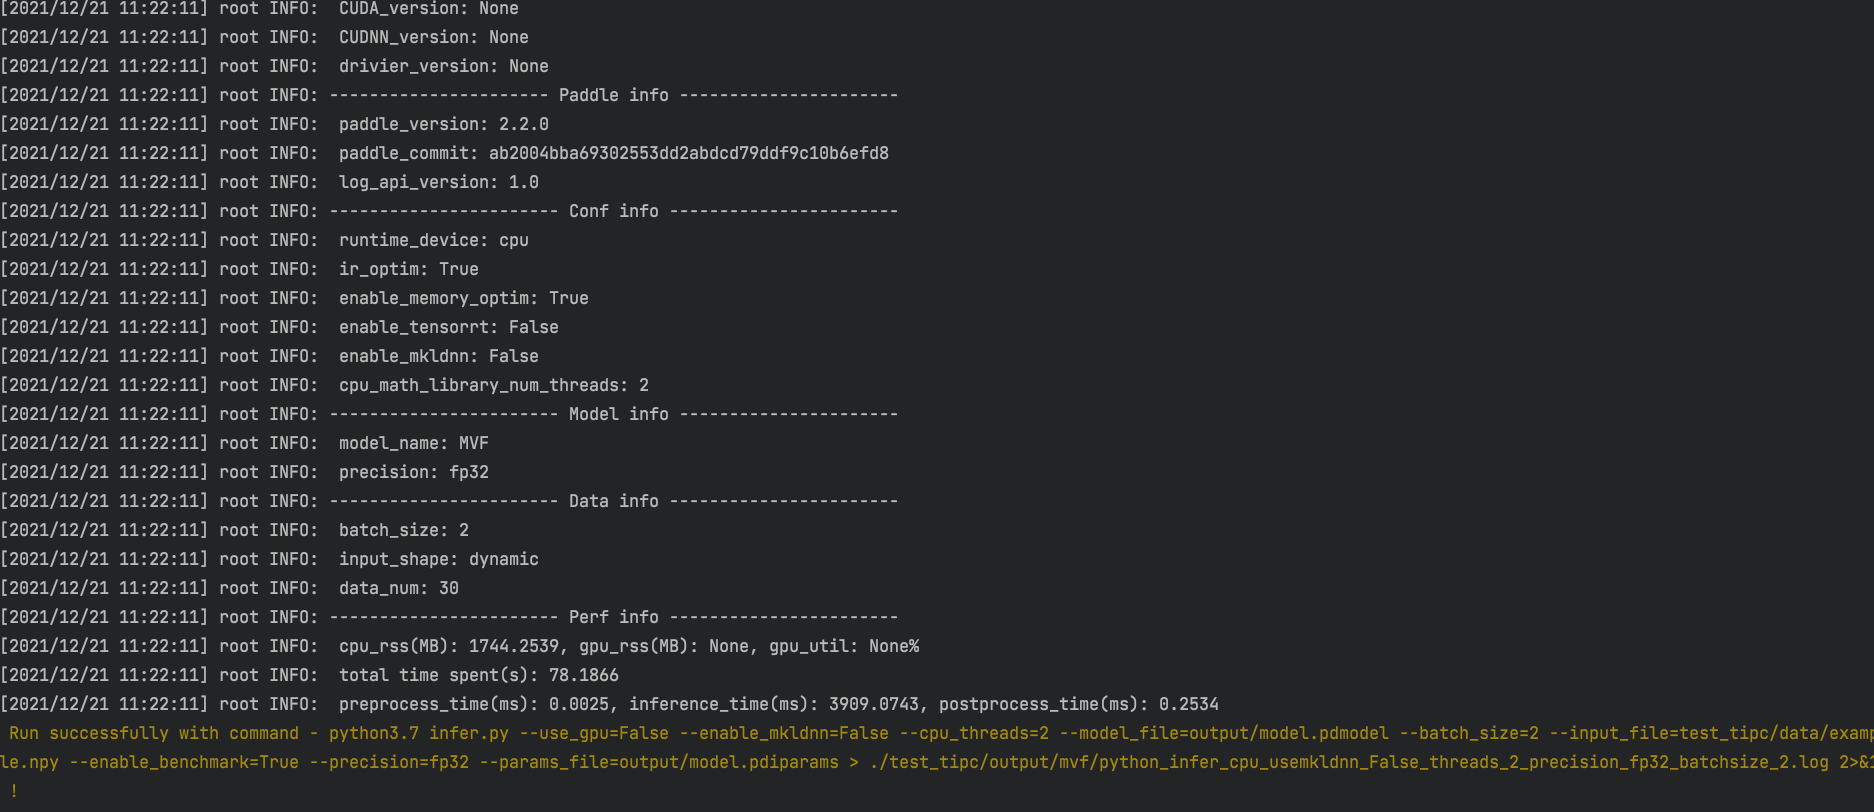
测试结果如截图所示:
6.代码结构与详细说明
├── README.md
├── logs # 训练以及评测日志
├── alignment
│  ├── README.md # 精度对齐说明文档
│  ├── step1 # 模型结构对齐检测脚本
│   ├── step2 # 评测指标对齐检测脚本
│   ├── step3 # 损失函数对齐检测脚本
│   ├── step4 # 反向对齐检测脚本
│   └── torch # torch模型核心代码
├── datasets # 数据集包
│   ├── __init__.py
│   ├── base.py #数据集基类
│   ├── file_client.py # 文件处理类
│   ├── pipelines
│   │   └── transforms.py # 数据增强类
│   ├── rawframe_dataset.py # 数据集类
│   └── utils.py #数据集工具类
├── models
│   ├── __init__.py
│   ├── base.py # 模型基类
│   ├── resnet.py # 标注resnet模型
│   ├── heads # 模型头部实现
│   └── recognizers # 识别模型框架
├── progress_bar.py #进度条工具
├── test.py # 评估程序
├── test_tipc # TIPC脚本
│   ├── README.md
│   ├── common_func.sh # 通用脚本程序
│   ├── configs
│   │   └── mvf
│   │       └── train_infer_python.txt # 单机单卡配置
│   ├── data
│   │   ├── example.npy # 推理用样例数据
│   │   └── mini_ucf.zip # 训练用小规模数据集
│   ├── output
│   ├── prepare.sh # 数据准备脚本
│   └── test_train_inference_python.sh # 训练推理测试脚本
├── timer.py # 时间工具类
├── train.py # 训练脚本
├── predict.py # 预测脚本
└── utils.py # 训练工具包
7.模型信息
| 信息 | 描述 |
|---|---|
| 模型名称 | MVF |
| 框架版本 | PaddlePaddle==2.2.0 |
| 应用场景 | 动作识别 |
8.心得体会
在复现MVF这篇论文的过程中,第一次了解到这种动态插拔修改模型的方式,为设计模型结构提供了一种新的思路。在复现过程中也遇到了精度达到论文中的指标的问题,为验证模型是否正确,完成了模型精度对齐的工作,最后证明模型复现正确,分析是由随机变量导致的精度波动,通过修改超参数,并多次训练,最终模型在UCF101数据集三种标注下均可以实现论文中的精度。
复现中遇到的问题
- 在TIPC认证中需要导出模型,使用paddle.jit.to_static接口的时候需要指定input数据的size, 本项目指定的是[-1, 16, 3, 224, 244],这代表输入的数据的batch size是不固定的。这时导出模型就会出现以下错误:
AssertionError: Only one dimension value of 'shape' in reshape can be -1. But received shape[1] is also -1.
查看代码发现在tsn_clshead.py中代码出现问题。
x = x.reshape([x.shape[0], -1])
这是因为在真正训练过程中x.shape[0]是确定的就是batch size,但是在导出模型的时候x.shape[0]为-1,这是reshape接收的是[-1, -1],这样必然会报错,随后需要修改代码。这行代码的目的是想将输出的特征图转换为一维向量(不包含batch维度),由于原数据形状有5个维度,所以改为:
x = x.reshape([x.shape[0], x.shape[1] * x.shape[2] * x.shape[3] * x.shape[4]])
这样就可以顺利的导出模型。
- 在tsn_clshead.py中,使用fcn_test模式,需要将Linear的参数复制到Conv3D的参数中,可使用paddle.nn.initializer.Assign接口接收Linear的参数创建一个initializer。然后就可以使用正常初始化参数方法来初始化Conv3D的参数,完成参数复制。相关代码如下:
# Linear层
self.new_fc = nn.Linear(self.in_channels, self.num_classes)

# Conv3D层
self.new_cls = nn.Conv3D(
                    self.in_channels,
                    self.num_classes,
                    1, 1, 0)

# 初始化Conv3D参数
weight = self.new_fc.weight.unsqueeze(-1).unsqueeze(-1).unsqueeze(-1)
weight = paddle.transpose(weight, [1, 0, 2, 3, 4])
initializer = paddle.nn.initializer.Assign(weight)
initializer(self.new_cls.weight)
initializer = paddle.nn.initializer.Assign(self.new_fc.bias)
initializer(self.new_cls.bias)
以上就是在复现过程中遇到的主要问题,如果同学们在复现过程遇到类似问题,也可以参考此方案解决问题。

学大模型,用大模型上飞桨星河社区!每天8点V100G算力免费领!免费领取ERNIE 4.0 100w Token >>>
更多推荐


 4
4 0
0- 0


 已为社区贡献1437条内容

所有评论(0)