
PaddleHub人脸关键点检测:一键生成蜡笔小新的远房表弟
AP-Kai:小新,现在考考你用一个成语来形容你的表弟 小新:惟妙惟肖,有问题吗?AP-Kai:没有问题。
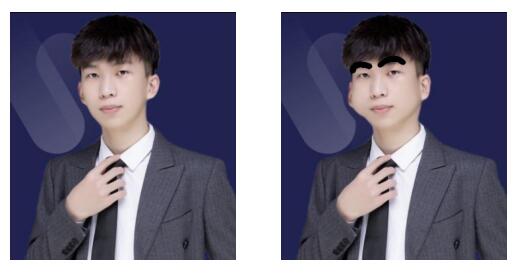
一键寻找蜡笔小新的远方表弟
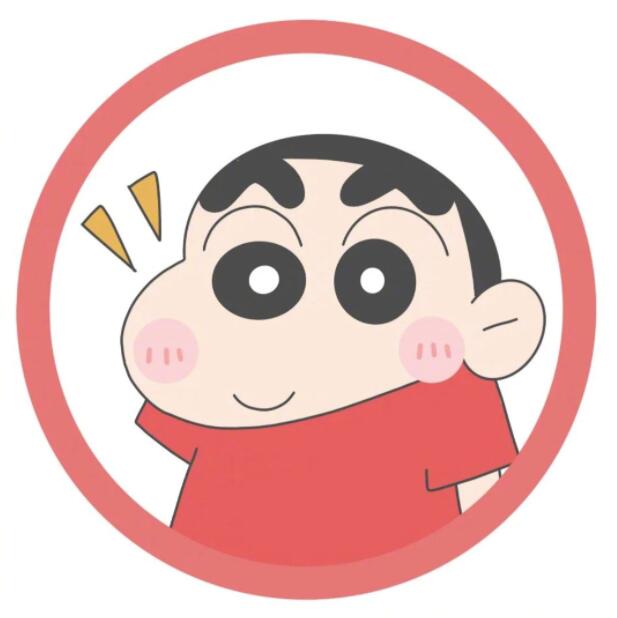
蜡笔小新应该是好多小伙伴的童年回忆之一,不会有人不喜欢蜡笔小新那招牌的粗眉毛以及圆嘟嘟的小脸蛋吧!不会吧不会吧!下面嘞,我们以宸哥作为工具人,还原蜡笔小新的远房表弟————蜡笔小宸!
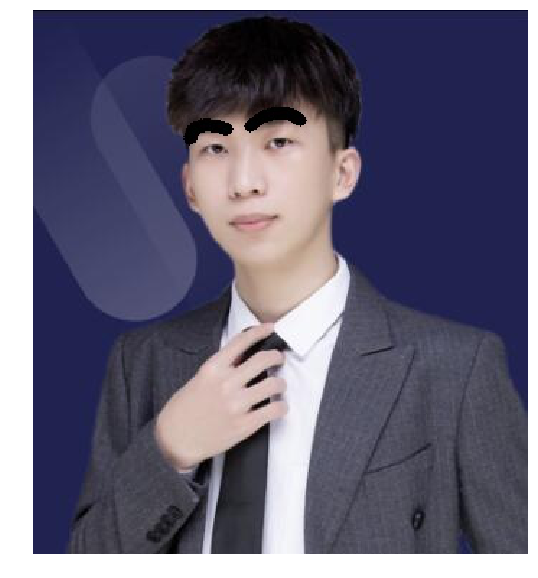
让我们先看一下蜡笔小宸,一睹为快!
跟着我的步伐,寻找蜡笔小新的远房表弟之路,正式开启!(二三四步骤为过程演示~一键寻找请在登陆蜡笔大陆之后跳至第五部分)
一、登陆蜡笔大陆
!pip install --upgrade pip
!pip install opencv-python==4.5.4.60
!pip install paddlehub==2.1.1
二、使用PaddleHub进行人脸关键点检测
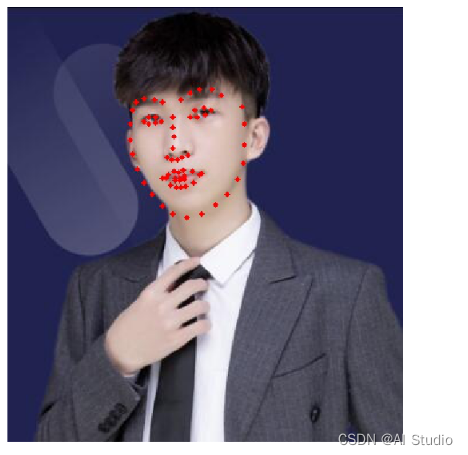
人脸关键点检测是人脸识别和分析领域中的关键一步,它是诸如自动人脸识别、表情分析、三维人脸重建及三维动画等其它人脸相关问题的前提和突破口。该 PaddleHub Module 的模型转换自 https://github.com/lsy17096535/face-landmark ,支持同一张图中的多个人脸检测。此步的目的是获取人脸68个关键点的坐标,如下图所示。有了人脸68个关键点的坐标,再接下来进行蜡笔眉的刻画,以及嘟嘟脸的生成就会轻松许多。
import cv2
import paddlehub as hub
import matplotlib.pyplot as plt
import matplotlib.image as mpimg
import numpy as np
import math
from PIL import Image
src_img = cv2.imread('example.jpg')

# 加载模型并进行预测
module = hub.Module(name="face_landmark_localization")
result = module.keypoint_detection(images=[src_img])

tmp_img = src_img.copy()
for index, point in enumerate(result[0]['data'][0]):
	# cv2.putText(img, str(index), (int(point[0]), int(point[1])), cv2.FONT_HERSHEY_COMPLEX, 3, (0,0,255), -1)
	cv2.circle(tmp_img, (int(point[0]), int(point[1])), 2, (0, 0, 255), -1)

res_img_path = 'face_landmark.jpg'
cv2.imwrite(res_img_path, tmp_img)

img = mpimg.imread(res_img_path)
# 展示预测68个关键点结果(若未显示关键点可视化结果请再次运行此cell)
plt.figure(figsize=(10,10))
plt.imshow(img)
plt.axis('off')
plt.show()
[2021-11-30 14:27:46,626] [ WARNING] - The _initialize method in HubModule will soon be deprecated, you can use the __init__() to handle the initialization of the object
[2021-11-30 14:27:46,743] [ WARNING] - The _initialize method in HubModule will soon be deprecated, you can use the __init__() to handle the initialization of the object
[37m---    Fused 0 subgraphs into layer_norm op.[0m
[37m---    Fused 0 subgraphs into layer_norm op.[0m
三、刻画蜡笔眉
在上一步中我们得到了人脸68个关键点坐标,其中18-22,23-27为眉毛的坐标值。想得到蜡笔小新这照片的粗粗眉,简单来讲只需将眉毛的坐标点连成线,控制适当的宽度即可。
这里可以使用opencv的line()函数轻松实现。
def thick_eyebrows(image, face_landmark, width):
	for i in range(18-1, 22-1):
		cv2.line(image, face_landmark[i], face_landmark[i+1], (0, 0, 0), width)
	for i in range(23-1, 27-1):
		cv2.line(image, face_landmark[i], face_landmark[i+1], (0, 0, 0), width)
	return image

# 提取出人脸关键点坐标
face_landmark = np.array(result[0]['data'][0], dtype='int')
# 生成蜡笔小新版眉毛
width = 8
src_img = thick_eyebrows(src_img, face_landmark, width)
cv2.imwrite('thick_eyebrows.jpg', src_img)


img = mpimg.imread('thick_eyebrows.jpg')
# 展示蜡笔眉
plt.figure(figsize=(10,10))
plt.imshow(img)
plt.axis('off')
plt.show()
四、打肿脸充小新
在这里,使用了图像局部平移算法。思路是:由变形前坐标,根据变形映射关系,得到变形后坐标。这其中变形映射关系是最关键的,不同的映射关系,将得到不同的变形效果。平移、缩放、旋转,对应的是不同的映射关系,即不同的变换公式。当然实际在计算过程中,用的是逆变换,即由变形后坐标,根据逆变换公式反算变形前坐标,然后插值得到该坐标rgb像素值,将该rgb值作为变形后坐标对应的像素值。这样才能保证变形后的图像是连续、完整的。
# 进行胖脸操作
def fat_face(image, face_landmark):
    end_point = face_landmark[30]

    # 胖左脸,3号点到5号点的距离作为一次胖脸距离
    dist_left = np.linalg.norm(face_landmark[3] - face_landmark[5])
    image = local_traslation_warp(image, face_landmark[3], end_point, dist_left)

    # 胖右脸,13号点到15号点的距离作为一次胖脸距离
    dist_right = np.linalg.norm(face_landmark[13] - face_landmark[15])
    image = local_traslation_warp(image, face_landmark[13], end_point, dist_right)
    return image
# 局部平移算法
def local_traslation_warp(image, start_point, end_point, radius):
	radius_square = math.pow(radius, 2)
	image_cp = image.copy()

	dist_se = math.pow(np.linalg.norm(end_point - start_point), 2)
	height, width, channel = image.shape
	for i in range(width):
		for j in range(height):
			# 计算该点是否在形变圆的范围之内
			# 优化,第一步,直接判断是会在(start_point[0], start_point[1])的矩阵框中
			if math.fabs(i - start_point[0]) > radius and math.fabs(j - start_point[1]) > radius:
				continue

			distance = (i - start_point[0]) * (i - start_point[0]) + (j - start_point[1]) * (j - start_point[1])

			if distance < radius_square:
				# 计算出(i,j)坐标的原坐标
				# 计算公式中右边平方号里的部分
				ratio = (radius_square - distance) / (radius_square - distance + dist_se)
				ratio = ratio * ratio

				# 映射原位置
				new_x = i + ratio * (end_point[0] - start_point[0])
				new_y = j + ratio * (end_point[1] - start_point[1])

				new_x = new_x if new_x >= 0 else 0
				new_x = new_x if new_x < height - 1 else height - 2
				new_y = new_y if new_y >= 0 else 0
				new_y = new_y if new_y < width - 1 else width - 2

				# 根据双线性插值法得到new_x, new_y的值
				image_cp[j, i] = bilinear_insert(image, new_x, new_y)

	return image_cp


# 双线性插值法
def bilinear_insert(image, new_x, new_y):
	w, h, c = image.shape
	if c == 3:
		x1 = int(new_x)
		x2 = x1 + 1
		y1 = int(new_y)
		y2 = y1 + 1

		part1 = image[y1, x1].astype(np.float) * (float(x2) - new_x) * (float(y2) - new_y)
		part2 = image[y1, x2].astype(np.float) * (new_x - float(x1)) * (float(y2) - new_y)
		part3 = image[y2, x1].astype(np.float) * (float(x2) - new_x) * (new_y - float(y1))
		part4 = image[y2, x2].astype(np.float) * (new_x - float(x1)) * (new_y - float(y1))

		insertvalue = part1 + part2 + part3 + part4

		return insertvalue.astype(np.int8)
# 进行胖脸操作
fat_nums = 3
for i in range(1, fat_nums):
	src_img = fat_face(src_img, face_landmark)

cv2.imwrite('res.jpg', src_img)
img = mpimg.imread('res.jpg')
# 展示蜡笔眉+嘟嘟嘴
plt.figure(figsize=(10,10))
plt.imshow(img)
plt.axis('off')
plt.show()
五、一键执行~(上述为过程展示部分,可在此处一键寻找远方表弟哦)
run.py中引出了四个参数,分别是:
img_path 输入图片路径
width 眉毛宽度
res_img_path 输出图片路径
fat_nums 嘟嘟脸系数
依照参数描述进行相应的修改即可,顺利运行下方命令并打印出done之后,可在左侧(/home/aistudio)目录下找到输出图片(默认:res.jpg)
!python run.py --img_path example.jpg --width 8 --res_img_path res.jpg --fat_nums 3
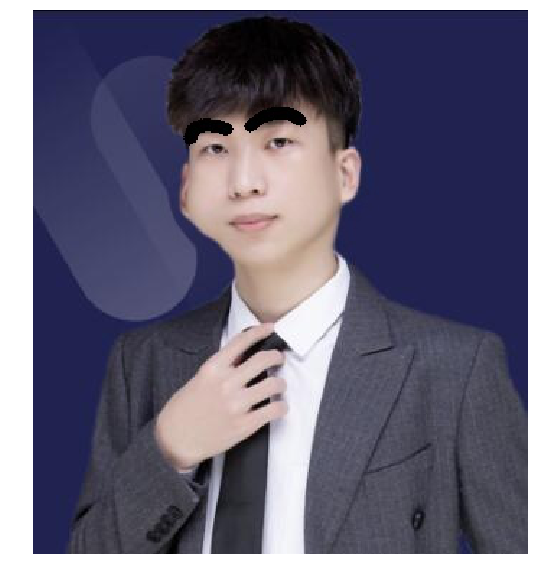
来瞧瞧效果吧!(受害者不定期更新~)


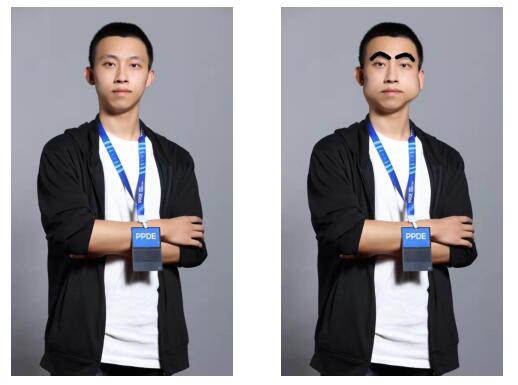
(妈妈,妈妈,我跟PPDE大佬们同框了哈哈哈哈)
总结
仅需简简单单的四步就能寻找到蜡笔小新的远方表弟,秃然又多了一堆兄弟呢。
这个方案的原理是首先对图片进行人脸关键点检测,有了人脸68个关键点坐标后就好办了。浓眉的生成仅需使用opencv在眉毛处进行画线操作,而第四步的“牙龈发炎生成器”则是利用局部平移算法完成的。
那最后的最后,,,不定期抽取幸运的小伙伴,我来帮你找你的远方兄弟哦(手动狗头)
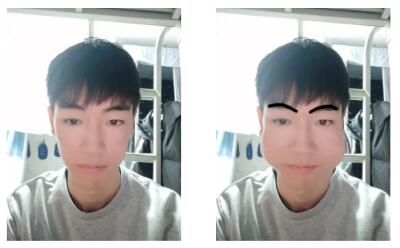
个人简介
作者: AP-Kai
学校: 沈阳工业大学 大二在读
AI Studio: https://aistudio.baidu.com/aistudio/personalcenter/thirdview/675310
GitHub: https://github.com/AP-Kai/AP-Kai
请点击此处查看本环境基本用法.
Please click here for more detailed instructions.

学大模型,用大模型上飞桨星河社区!每天8点V100G算力免费领!免费领取ERNIE 4.0 100w Token >>>
更多推荐


 1
1 0
0- 0


 已为社区贡献1437条内容

所有评论(0)