
【去后厂村开游戏厅吧】基于pp-tinypose的体感贪吃蛇游戏
使用PaddleHub对摄像头画面进行实时关键点检测,根据腰部晃动幅度控制贪吃蛇前进方向,保护你的腰椎!
【去后厂村开游戏厅吧】基于pp-tinypose的体感贪吃蛇游戏
你是否也被腰痛所困扰!你是否也是久坐一族!你是否也是网瘾少年!
来玩体感贪吃蛇吧!只需要电脑上有摄像头就可以玩体感游戏啦~远离屏幕,扭一扭腰部,保护你的腰椎!
准备好项目所需环境后,fork本项目,将demo.zip下载到本地,运行其中的main.py即可
游戏介绍和效果展示
左侧是游戏画面,右侧是人物和检测结果。程序检测身上的关键点位置(肩部中心和胯部中心),并计算两个中心点和垂直线的偏移角度,作为贪吃蛇的方向调整的角度,从而调整蛇的前进方向吃到食物(红色的点)。
环境准备
运行本项目需要准备:PC(带有CPU即可),USB摄像头(笔记本自带的摄像头也可以),摄像头所拍摄的场地需要保证一定的空间大小。
友情链接
【去后厂村摆摊吧】基于Jeston Nano部署(可用PC代替)的实时预览美甲机
部署流程
PP-TinyPose
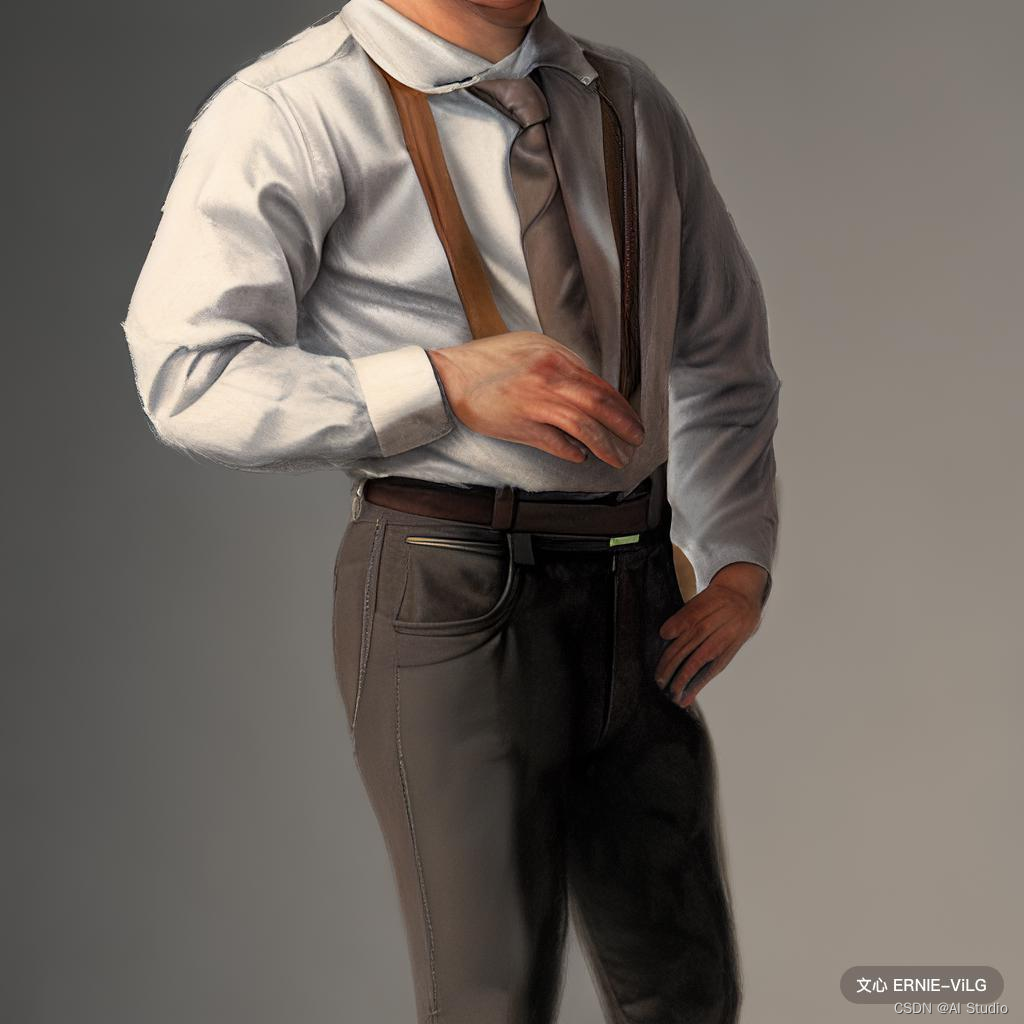
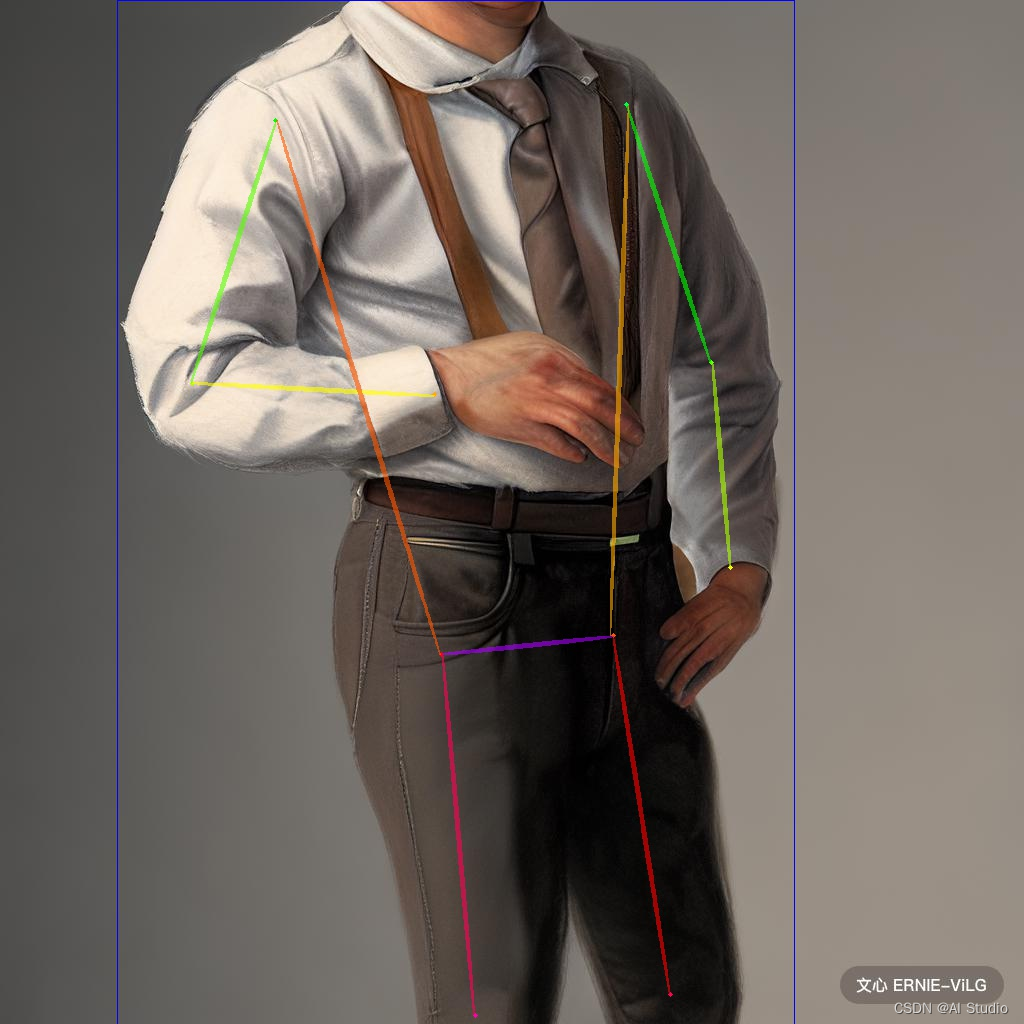
PP-TinyPose是PaddleDetecion针对移动端设备优化的实时关键点检测模型,可流畅地在移动端设备上执行多人姿态估计任务。
简单来说,给PP-TinyPose输入一张图片,PP-TinyPose能够告诉你,这张图片上的人的鼻子,肩膀,腕部等的坐标点。
| 原图 | 预测结果 |
|---|---|
 |
 |
具体返回的信息包括:
    0: "Nose",
    1: "Left Eye",
    2: "Right Eye",
    3: "Left Ear",
    4: "Right Ear",
    5: "Left Shoulder,
    6: "Right Shoulder",
    7: "Left Elbow",
    8: "Right Elbow",
    9: "Left Wrist",
    10: "Right Wrist",
    11: "Left Hip",
    12: "Right Hip",
    13: "Left Knee",
    14: "Right Knee",
    15: "Left Ankle",
    16: "Right Ankle"
使用PaddleHub调用PP-TinyPose
通过以下代码能够调用PP-TinyPose
import paddlehub as hub
import cv2

model = hub.Module(name="pp-tinypose")
result = model.predict('test.jpg', save_path='pp_tinypose_output', visualization=True, use_gpu=False)
Download https://bj.bcebos.com/paddlehub/paddlehub_dev/pp-tinypose.tar.gz
[##################################################] 100.00%
Decompress /home/aistudio/.paddlehub/tmp/tmpjjiv6rlm/pp-tinypose.tar.gz
[##################################################] 100.00%


[2022-10-09 22:02:16,925] [    INFO] - Successfully installed pp-tinypose-1.0.0


-----------  Model Configuration -----------
Model Arch: GFL
Transform Order:
--transform op: Resize
--transform op: NormalizeImage
--transform op: Permute
--------------------------------------------
-----------  Model Configuration -----------
Model Arch: HRNet
Transform Order:
--transform op: TopDownEvalAffine
--transform op: Permute
--------------------------------------------
keypoint visualize image saved to: pp_tinypose_output/test_vis.jpg
print(result)
[['test.jpg', [[117, 0, 794, 1024]], [[[[511.39947509765625, -60.0409049987793, 0.19108328223228455], [516.75, -104.125, 0.27159687876701355], [460.8620910644531, -81.80257415771484, 0.16921846568584442], [548.4147338867188, -67.76658630371094, 0.3136347234249115], [371.63397216796875, -51.97673797607422, 0.2574734091758728], [626.3237915039062, 104.2344970703125, 0.8274574875831604], [275.393798828125, 120.93238067626953, 0.8167709112167358], [711.4954833984375, 362.572998046875, 0.8602982759475708], [192.03163146972656, 383.2514343261719, 0.9001355171203613], [730.9822387695312, 567.8120727539062, 0.8941538333892822], [434.97442626953125, 394.9347229003906, 0.8732615113258362], [613.3155517578125, 635.9180297851562, 0.6980478763580322], [441.7671813964844, 654.966064453125, 0.6859287023544312], [670.1980590820312, 994.3307495117188, 0.7893757820129395], [475.2958984375, 1015.068359375, 0.7613726854324341], [695.625, 1128.125, 0.14571835100650787], [477.0, 1128.125, 0.11894053965806961]]], [[0.5632040500640869]]]]]
其中result由几个部分组成,分别是图片名称,bbox,以及各个关节点的坐标。
这里只关注各个关节点的坐标。以Right Elbow为例,result[0][2][0][0][8]就是右肘的坐标啦。
基于PyQt5的贪吃蛇
以下代码需要在本地运行,不能再Aistudio上运行的~
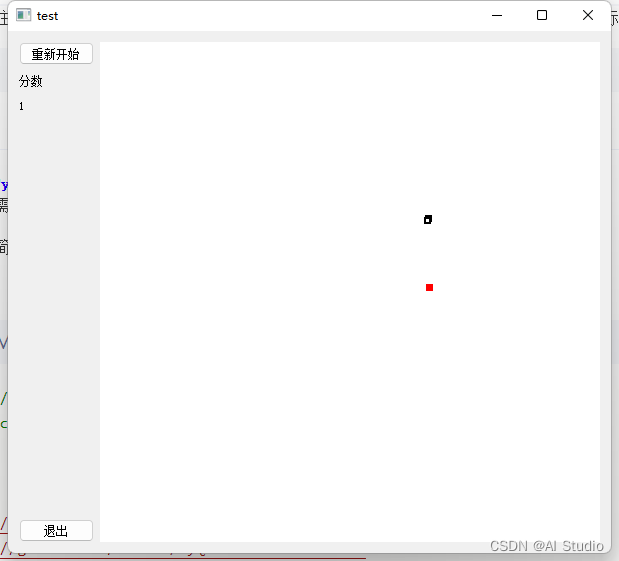
以下代码简单实现了一个贪吃蛇,按Q蛇的前进方向偏向左边,按E蛇的前进方向偏向右边。截图如下~
#!/usr/bin/python3
# -*- coding: utf-8 -*-

"""
Thanks to
https://blog.csdn.net/u014453898/article/details/88083173
https://github.com/maicss/PyQt-Chinese-tutorial
https://maicss.gitbooks.io/pyqt5/content/
zetcode.com
"""

import copy
import sys
import cv2
import numpy as np
import paddle
import math
import time
import collections
import os
import sys
from PyQt5.QtWidgets import QWidget, QDesktopWidget, QApplication, QPushButton, QFileDialog, QLabel, QTextEdit, \
    QGridLayout, QFrame, QColorDialog
from PyQt5.QtCore import QTimer, Qt
from PyQt5.QtGui import QColor, QImage, QPixmap
import fastdeploy

class snack(object):
    def __init__(self, width = 500, height = 500):
        self.width = width
        self.height = height
        self.x = width/2
        self.y = height/2
        self.direction = 0
        self.base_direction = math.pi/2
        self.body_list = [[int(self.x), int(self.y)]]
        self.step_size = 2
        self.body_size = 1

    def update(self):
        self.x += math.cos(self.base_direction) * self.step_size
        self.y += math.sin(self.base_direction) * self.step_size

        # bounds
        if self.direction != 0:
            self.base_direction += self.direction
            self.direction = 0
            if self.base_direction > 2 * math.pi:
                self.base_direction -= 2 * math.pi
            if self.base_direction < -2 * math.pi:
                self.base_direction += -2 * math.pi

        if self.x>=self.width:
            self.x -= self.width
        if self.x<0:
            self.x+=self.width
        if self.y>=self.height:
            self.y -= self.height
        if self.y<0:
            self.y+=self.height
        # end bounds

        for i in range(self.body_size - 1):
            self.body_list[i] = self.body_list[i + 1]

        self.body_list[self.body_size - 1] = [int(self.x), int(self.y)]

    def add_size(self):
        self.body_size += 1
        self.body_list = [[int(self.x), int(self.y)]]+self.body_list

class Window(QWidget):

    def __init__(self):
        super().__init__()

        self.game_width, self.game_height = [500, 500]

        self.initGame()
        self.initClock()
        self.initUI()


    def initGame(self):
        self.score = 0
        self.snack = snack(self.game_width, self.game_height)
        self.map = np.ones([self.game_width, self.game_height, 3]).astype('uint8') * 255
        self.food = [np.random.randint(self.game_width-10)+5, np.random.randint(self.game_height-10)+5]

    # 初始化Camera相关信息
    def initClock(self):
        # 通过定时器读取数据
        self.flush_clock = QTimer()  # 定义定时器,用于控制显示视频的帧率
        self.flush_clock.start(60)   # 定时器开始计时30ms,结果是每过30ms从摄像头中取一帧显示
        self.flush_clock.timeout.connect(self.updata_frame)  # 若定时器结束,show_frame()

    def initUI(self):

        grid = QGridLayout()
        self.setLayout(grid)

        Choose_Color = QPushButton('重新开始', self)
        grid.addWidget(Choose_Color, 0, 0, 1, 1)
        Choose_Color.clicked.connect(self.initGame)

        ConstText = QLabel('分数', self)
        grid.addWidget(ConstText, 1, 0, 1, 1)

        self.ScoreText = QLabel(str(self.score), self)
        grid.addWidget(self.ScoreText, 2, 0, 1, 1)

        Exit_Exe = QPushButton('退出', self)
        grid.addWidget(Exit_Exe, 19, 0, 1, 1)
        Exit_Exe.clicked.connect(self.close)

        self.Pred_Box = QLabel()  # 定义显示视频的Label
        self.Pred_Box.setFixedSize(self.game_width, self.game_height)
        grid.addWidget(self.Pred_Box, 0, 1, 20, 20)

        self.setWindowTitle('test')
        self.show()

    def keyPressEvent(self, event):
        if event.key() == Qt.Key_Q:
            self.snack.direction += 10/360*math.pi
        if event.key() == Qt.Key_E:
            self.snack.direction -= 10/360*math.pi

    def updata_frame(self):
        self.snack.update()

        tmp = copy.deepcopy(self.map)
        for x, y in self.snack.body_list:
            tmp[x - 3:x + 4, y - 3:y + 4] = 0
            tmp[x - 1:x + 2, y - 1:y + 2] = 255

        tmp[self.food[0] - 3:self.food[0] + 4, self.food[1] - 3:self.food[1] + 4] = [255, 0, 0]

        if (self.food[0]-self.snack.x)**2+(self.food[1]-self.snack.y)**2 <= 4**2: # 直线距离
            self.food = [np.random.randint(self.game_width-10)+5, np.random.randint(self.game_height-10)+5]
            self.snack.add_size()

            self.score += 1
            self.ScoreText.setText(str(self.score))

        showPic = QImage(tmp, tmp.shape[1], tmp.shape[0], QImage.Format_RGB888)
        self.Pred_Box.setPixmap(QPixmap.fromImage(showPic))


if __name__ == '__main__':
    app = QApplication(sys.argv)
    ex = Window()
    sys.exit(app.exec_())
基于PyQt5和PP-TinyPose的体感贪吃蛇
将上述代码和PaddleHub融合一下就能用体态姿势代替Q和W啦,比如:腰部向左偏斜代替Q,反之代替W。
代码如下:
#!/usr/bin/python3
# -*- coding: utf-8 -*-

"""
Thanks to
https://blog.csdn.net/u014453898/article/details/88083173
https://github.com/maicss/PyQt-Chinese-tutorial
https://maicss.gitbooks.io/pyqt5/content/
zetcode.com
"""
import copy
import sys
import cv2
import numpy as np
import math
import sys
from PyQt5.QtWidgets import QWidget, QDesktopWidget, QApplication, QPushButton, QFileDialog, QLabel, QTextEdit, \
    QGridLayout, QFrame, QColorDialog
from PyQt5.QtCore import QTimer, Qt
from PyQt5.QtGui import QColor, QImage, QPixmap
import paddlehub

class snack(object):
    def __init__(self, width = 500, height = 500):
        self.width = width
        self.height = height
        self.x = width/2
        self.y = height/2
        self.direction = 0
        self.base_direction = math.pi/2
        self.body_list = [[int(self.x), int(self.y)]]
        self.step_size = 8
        self.body_size = 1

    def update(self):
        self.x += math.cos(self.base_direction) * self.step_size
        self.y += math.sin(self.base_direction) * self.step_size

        # bounds
        if self.direction != 0:
            self.base_direction += self.direction
            self.direction = 0
            if self.base_direction > 2 * math.pi:
                self.base_direction -= 2 * math.pi
            if self.base_direction < -2 * math.pi:
                self.base_direction += -2 * math.pi

        if self.x>=self.width:
            self.x -= self.width
        if self.x<0:
            self.x+=self.width
        if self.y>=self.height:
            self.y -= self.height
        if self.y<0:
            self.y+=self.height
        # end bounds

        for i in range(self.body_size - 1):
            self.body_list[i] = self.body_list[i + 1]

        self.body_list[self.body_size - 1] = [int(self.x), int(self.y)]

    def add_size(self):
        self.body_size += 1
        self.body_list = [[int(self.x), int(self.y)]]+self.body_list

class Window(QWidget):

    def __init__(self):
        super().__init__()

        # self.game_width, self.game_height = [500, 500]
        self.game_width, self.game_height = [QApplication.desktop().screenGeometry().height() - 200,
                                             QApplication.desktop().screenGeometry().height() - 200]
        self.img_width, self.img_height = [int((self.game_height/2-20)/3*4),
                                           int(self.game_height/2-20)]
        self.up_key_points = [5,6]
        self.down_key_points = [11,12]
        self.block_size = 8
        self.initModel()
        self.initCamera()
        self.initGame()
        self.initClock()
        self.initUI()

    def initCamera(self):
        # 开启视频通道
        self.camera_id = 0 # 为0时表示视频流来自摄像头
        self.camera = cv2.VideoCapture()  # 视频流
        self.camera.open(self.camera_id)

    def initModel(self):
        self.model = paddlehub.Module(name="pp-tinypose")
        result = self.model.predict('1.jpg', save_path='pp_tinypose_output', visualization=False, use_gpu=False)

    def initGame(self):
        self.score = 0
        self.snack = snack(self.game_width, self.game_height)
        self.map = np.ones([self.game_width, self.game_height, 3]).astype('uint8') * 255
        self.food = [np.random.randint(self.game_width-10)+5, np.random.randint(self.game_height-10)+5]

    # 初始化Camera相关信息
    def initClock(self):
        # 通过定时器读取数据
        self.flush_clock = QTimer()  # 定义定时器,用于控制显示视频的帧率
        self.flush_clock.start(60)   # 定时器开始计时30ms,结果是每过30ms从摄像头中取一帧显示
        self.flush_clock.timeout.connect(self.updata_frame)  # 若定时器结束,show_frame()

    def initUI(self):

        grid = QGridLayout()
        self.setLayout(grid)

        Choose_Color = QPushButton('重新开始', self)
        grid.addWidget(Choose_Color, 0, 0, 1, 1)
        Choose_Color.clicked.connect(self.initGame)

        ConstText = QLabel('分数', self)
        grid.addWidget(ConstText, 1, 0, 1, 1)

        self.ScoreText = QLabel(str(self.score), self)
        grid.addWidget(self.ScoreText, 2, 0, 1, 1)

        ConstText = QLabel('选择上检测点', self)
        grid.addWidget(ConstText, 4, 0, 1, 1)

        Set_Up_Points = QPushButton('鼻子', self)
        grid.addWidget(Set_Up_Points, 5, 0, 1, 1)
        Set_Up_Points.clicked.connect(self.set_up_points)

        Set_Up_Points = QPushButton('肩膀', self)
        grid.addWidget(Set_Up_Points, 6, 0, 1, 1)
        Set_Up_Points.clicked.connect(self.set_up_points)

        Set_Up_Points = QPushButton('肘部', self)
        grid.addWidget(Set_Up_Points, 7, 0, 1, 1)
        Set_Up_Points.clicked.connect(self.set_up_points)

        ConstText = QLabel('选择下检测点', self)
        grid.addWidget(ConstText, 9, 0, 1, 1)

        Set_Up_Points = QPushButton('肩膀', self)
        grid.addWidget(Set_Up_Points, 10, 0, 1, 1)
        Set_Up_Points.clicked.connect(self.set_down_points)

        Set_Up_Points = QPushButton('肘部', self)
        grid.addWidget(Set_Up_Points, 11, 0, 1, 1)
        Set_Up_Points.clicked.connect(self.set_down_points)

        Set_Up_Points = QPushButton('胯部', self)
        grid.addWidget(Set_Up_Points, 12, 0, 1, 1)
        Set_Up_Points.clicked.connect(self.set_down_points)

        Exit_Exe = QPushButton('退出', self)
        grid.addWidget(Exit_Exe, 19, 0, 1, 1)
        Exit_Exe.clicked.connect(self.close)

        self.Game_Box = QLabel()  # 定义显示视频的Label
        self.Game_Box.setFixedSize(self.game_width, self.game_height)
        grid.addWidget(self.Game_Box, 0, 1, 20, 20)

        self.Raw_Box = QLabel()  # 定义显示视频的Label
        self.Raw_Box.setFixedSize(self.img_width, self.img_height)
        grid.addWidget(self.Raw_Box, 0, 21, 10, 14)

        self.Pred_Box = QLabel()  # 定义显示视频的Label
        self.Pred_Box.setFixedSize(self.img_width, self.img_height)
        grid.addWidget(self.Pred_Box, 10, 21, 10, 14)

        self.setWindowTitle('test')
        self.show()

    def keyPressEvent(self, event):
        if event.key() == Qt.Key_Q:
            self.snack.direction += 10/360*math.pi
        if event.key() == Qt.Key_E:
            self.snack.direction -= 10/360*math.pi

    def updata_frame(self):
        self.snack.update()

        # read pic from camera
        _, img = self.camera.read()  # 从视频流中读取
        img = cv2.flip(img, 1) # 摄像头画面反转

        img2 = cv2.resize(img, (self.img_width, self.img_height))  # 把读到的帧的大小重新设置为 640x480
        showPic = QImage(img2, img2.shape[1], img2.shape[0], QImage.Format_BGR888)
        self.Raw_Box.setPixmap(QPixmap.fromImage(showPic))

        try:
            result = self.model.predict(img, visualization=False, use_gpu=False)

            top_y = (result[0][2][0][0][self.up_key_points[0]][1] + result[0][2][0][0][self.up_key_points[1]][1]) / 2
            top_x = (result[0][2][0][0][self.up_key_points[0]][0] + result[0][2][0][0][self.up_key_points[1]][0]) / 2
            bottom_y = (result[0][2][0][0][self.down_key_points[0]][1] + result[0][2][0][0][self.down_key_points[1]][1]) / 2
            bottom_x = (result[0][2][0][0][self.down_key_points[0]][0] + result[0][2][0][0][self.down_key_points[1]][0]) / 2

            self.snack.direction = math.acos((top_x - bottom_x) / ((top_x - bottom_x) ** 2 + (top_y - bottom_y) ** 2) ** (1 / 2)) - math.pi/2

            # print(top_x,top_y, bottom_x, bottom_y)
            # print(self.snack.direction)

            img[int(top_y)-10:int(top_y)+10,int(top_x)-10:int(top_x)+10] = [0, 0, 255]
            img[int(bottom_y) - 10:int(bottom_y) + 10, int(bottom_x) - 10:int(bottom_x) + 10] = [0, 0, 255]
            showPic = QImage(img, img.shape[1], img.shape[0], QImage.Format_BGR888)
            self.Pred_Box.setPixmap(QPixmap.fromImage(showPic))

        except:
            print('infer error')

        tmp = copy.deepcopy(self.map)
        for x, y in self.snack.body_list:
            tmp[x - self.block_size:x + self.block_size+1, y - self.block_size:y + self.block_size+1] = 0
            # tmp[x - 1:x + 2, y - 1:y + 2] = 255

        tmp[self.food[0] - self.block_size:self.food[0] + self.block_size+1, self.food[1] - self.block_size:self.food[1] + self.block_size+1] = [255, 0, 0]

        if (self.food[0]-self.snack.x)**2+(self.food[1]-self.snack.y)**2 <= (self.block_size*1.5)**2: # 直线距离
            self.food = [np.random.randint(self.game_width-10)+5, np.random.randint(self.game_height-10)+5]
            self.snack.add_size()

            self.score += 1
            self.ScoreText.setText(str(self.score))

        showPic = QImage(tmp, tmp.shape[1], tmp.shape[0], QImage.Format_RGB888)
        self.Game_Box.setPixmap(QPixmap.fromImage(showPic))

    def set_up_points(self):
        if self.sender().text() == '鼻子':
            self.up_key_points = [0,0]
        elif self.sender().text() == '肩膀':
            self.up_key_points = [5,6]
        elif self.sender().text() == '肘部':
            self.up_key_points = [7,8]

    def set_down_points(self):
        if self.sender().text() == '肩膀':
            self.down_key_points = [5,6]
        elif self.sender().text() == '肘部':
            self.down_key_points = [7,8]
        elif self.sender().text() == '胯部':
            self.down_key_points = [11,12]

if __name__ == '__main__':
    app = QApplication(sys.argv)
    ex = Window()
self.up_key_points = [7,8]

    def set_down_points(self):
        if self.sender().text() == '肩膀':
            self.down_key_points = [5,6]
        elif self.sender().text() == '肘部':
            self.down_key_points = [7,8]
        elif self.sender().text() == '胯部':
            self.down_key_points = [11,12]

if __name__ == '__main__':
    app = QApplication(sys.argv)
    ex = Window()
    sys.exit(app.exec_())
结语
最后提醒大家一下,fork本项目,下载里面demo.zip到本地,并且保证本地python环境里安装了paddlehub、cv2、pyqt5就可以运行main.py快乐玩耍啦~
当然你赋值粘贴上面的代码也是可以啦,不过需要自己准备一张名为1.jpg的图片在相同文件夹下面哦~
最后的最后!做一个真正的电子运动玩家吧!保护腰部真的很重要QWQ
欢迎大家一起入股后厂村游戏厅呀!争取有一天将游戏厅开到Wave Summit里!
请点击此处查看本环境基本用法.
Please click here for more detailed instructions.
此文章为搬运
原项目链接

学大模型,用大模型上飞桨星河社区!每天8点V100G算力免费领!免费领取ERNIE 4.0 100w Token >>>
更多推荐


 0
0 0
0- 0


 已为社区贡献1436条内容

所有评论(0)